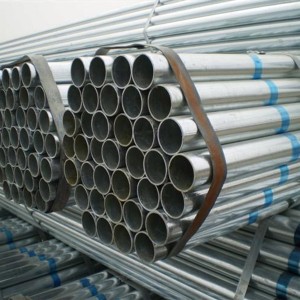
Galvanized Pipe
The process flow is: black tube-alkaline washing-water washing-pickling-water rinsing-soaking aid-drying-hot dip galvanizing-external blowing-internal blowing-air cooling-water cooling -Passivation-water rinsing-inspection-weighing-storage.


1, Brand and chemical composition
The grade and chemical composition of the steel for galvanized steel pipes should comply with the grade and chemical composition of the steel for black pipes as specified in GB/T3091.
2, Manufacturing method
The manufacturing method of the black pipe (furnace welding or electric welding) is selected by the manufacturer. Hot-dip galvanizing is used for galvanizing.
3. Thread and pipe joint
(a) For galvanized steel pipes delivered with threads, the threads should be machined after galvanizing. The thread should comply with YB 822 regulations.
(b) Steel pipe joints should comply with YB 238; malleable cast iron pipe joints should comply with YB 230.
4. Mechanical properties The mechanical properties of steel pipes before galvanizing should meet the requirements of GB 3091.
5. Uniformity of the galvanized layer Galvanized steel pipe should be tested for the uniformity of the galvanized layer. The steel pipe sample shall not turn red (copper-plated) after being immersed in copper sulfate solution for 5 consecutive times.
6, Cold bend test galvanized steel pipe with a nominal diameter of not more than 50mm should be cold bend test. The bending angle is 90°, and the bending radius is 8 times the outer diameter. There is no filler during the test, and the weld of the sample should be placed on the outside or upper part of the bending direction. After the test, there should be no cracks and peeling of the zinc layer on the sample.
7, Water pressure test The water pressure test should be carried out in the clarinet, and eddy current testing can also be used instead of the water pressure test. The test pressure or the size of the comparison sample for eddy current testing shall meet the requirements of GB 3092. The mechanical properties of steel are important indicators to ensure the final use performance (mechanical properties) of steel.
①Tensile strength (σb): The maximum force (Fb) that the sample bears when it breaks during the stretching process, divided by the stress (σ) obtained by dividing the original cross-sectional area (So) of the sample, is called the resistance Tensile strength (σb), the unit is N/mm2 (MPa). It represents the maximum ability of a metal material to resist damage under tensile force. In the formula: Fb-the maximum force that the sample bears when it is broken, N (Newton); So-the original cross-sectional area of the sample, mm2.
②Yield point (σs): For a metal material with a yield phenomenon, the stress at which the sample can continue to elong without increasing the force during the stretching process is called the yield point. If the force drops, the upper and lower yield points should be distinguished. The unit of yield point is N/mm2 (MPa). Upper Yield Point (σsu): The maximum stress before the specimen yields and the force drops for the first time; Lower Yield Point (σsl): The minimum stress in the yield stage when the initial transient effect is not taken into account. Where: Fs--yield force (constant) during the tensile process of the sample, N (Newton) So--the original cross-sectional area of the sample, mm2.
③ Elongation after breaking: (σ) In the tensile test, the percentage of the length of the gauge length increased after the sample is broken to the original gauge length is called the elongation. Expressed by σ, the unit is %. In the formula: L1-the gauge length of the specimen after breaking, in mm; L0-the original gauge length of the specimen, in mm.
④ Reduction of area: (ψ) In the tensile test, the percentage of the maximum reduction of the cross-sectional area at the reduced diameter of the sample after the sample is broken to the original cross-sectional area is called the reduction of area. Expressed in ψ, the unit is %. In the formula: S0-the original cross-sectional area of the sample, mm2; S1-the minimum cross-sectional area at the reduced diameter of the sample after it is broken, mm2.
⑤ Hardness index: The ability of metal materials to resist the indentation of hard objects on the surface is called hardness. According to different test methods and scope of application, hardness can be divided into Brinell hardness, Rockwell hardness, Vickers hardness, Shore hardness, micro hardness and high temperature hardness. There are three commonly used pipes: Brinell, Rockwell, and Vickers hardness.
Brinell hardness (HB): Use a steel ball or cemented carbide ball with a certain diameter to press it into the surface of the sample with the specified test force (F), remove the test force after the specified holding time, and measure the indentation diameter on the surface of the sample (L). The Brinell hardness value is the quotient obtained by dividing the test force by the spherical surface area of the indentation. Expressed in HBS (steel ball), the unit is N/mm2 (MPa).


